Redis 安装和配置
如果你用 Spring Data Redis 依赖请注意
- 请先看官网最新支持到哪个版本的依赖:https://docs.spring.io/spring-data/data-redis/docs/current/reference/html/#new-features
- 查看锚点为:
New in Spring Data Redis的内容
- 查看锚点为:
- 目前 201712 支持 Redis 3.2
如果你用 RedisDesktopManager 客户端请注意
- 请查看介绍中支持哪个版本:https://github.com/uglide/RedisDesktopManager
- 目前 201712 支持 2.8 以上
Docker 下安装 Redis
- 创建一个宿主机目录用来存放 redis 配置文件:
mkdir -p /data/docker/redis/conf - 创建一个宿主机以后用来存放数据的目录:
mkdir -p /data/docker/redis/db - 赋权:
chmod 777 -R /data/docker/redis 自己编写一个配置文件
vim /data/docker/redis/conf/redis.conf,内容如下:Redis 默认的配置文件内容:
安全情况的几个特殊配置:
bind 127.0.0.1
requirepass adgredis123456
protected-mode yes

免密情况:
bind 0.0.0.0
protected-mode no

其他:
port 6379
tcp-backlog 511
timeout 0
tcp-keepalive 300
daemonize no
supervised no
pidfile /data/redis_6379.pid
loglevel notice
logfile ""
databases 16
save 900 1
save 300 10
save 60 10000
stop-writes-on-bgsave-error yes
rdbcompression yes
rdbchecksum yes
dbfilename dump.rdb
dir /data
slave-serve-stale-data yes
slave-read-only yes
repl-diskless-sync no
repl-diskless-sync-delay 5
repl-disable-tcp-nodelay no
slave-priority 100
appendonly no
appendfilename "appendonly.aof"
appendfsync everysec
no-appendfsync-on-rewrite no
auto-aof-rewrite-percentage 100
auto-aof-rewrite-min-size 64mb
aof-load-truncated yes
lua-time-limit 5000
slowlog-log-slower-than 10000
slowlog-max-len 128
latency-monitor-threshold 0
notify-keyspace-events ""
hash-max-ziplist-entries 512
hash-max-ziplist-value 64
list-max-ziplist-size -2
list-compress-depth 0
set-max-intset-entries 512
zset-max-ziplist-entries 128
zset-max-ziplist-value 64
hll-sparse-max-bytes 3000
activerehashing yes
client-output-buffer-limit normal 0 0 0
client-output-buffer-limit slave 256mb 64mb 60
client-output-buffer-limit pubsub 32mb 8mb 60
hz 10
aof-rewrite-incremental-fsync yes
- 启动镜像:
docker run -d -ti -p 6379:6379 -v /data/docker/redis/conf/redis.conf:/etc/redis/redis.conf -v /data/docker/redis/db:/data --restart always --name cloud-redis redis:3.2 redis-server /etc/redis/redis.conf - 查看镜像运行情况:
docker ps - 进入镜像中 redis shell 交互界面:
docker exec -it cloud-redis redis-cli -h 127.0.0.1 -p 6379 -a adgredis123456 - 重新启动服务:
docker restart cloud-redis
RedisCluster 集群(Docker 方式)
Redis 容器准备
- 目标:3 主 3 从(一般都是推荐奇数个 master)
- 最小集群数推荐是:3
- 测试机的最低配置推荐是:2C4G
- 拉取镜像:
docker pull registry.cn-shenzhen.aliyuncs.com/youmeek/redis-to-cluster:3.2.3 - 重新打个 tag(旧名字太长了):
docker tag registry.cn-shenzhen.aliyuncs.com/youmeek/redis-to-cluster:3.2.3 redis-to-cluster:3.2.3 - 创建网段:
docker network create --subnet=172.19.0.0/16 net-redis-to-cluster - 宿主机创建配置文件:
mkdir -p /data/docker/redis-to-cluster/config && vim /data/docker/redis-to-cluster/config/redis.conf
bind 0.0.0.0
protected-mode yes
port 6379
tcp-backlog 511
timeout 0
tcp-keepalive 300
daemonize yes
supervised no
pidfile /var/run/redis_6379.pid
loglevel notice
logfile ""
databases 16
save 900 1
save 300 10
save 60 10000
stop-writes-on-bgsave-error yes
rdbcompression yes
rdbchecksum yes
dbfilename dump.rdb
dir ./
slave-serve-stale-data yes
slave-read-only yes
repl-diskless-sync no
repl-diskless-sync-delay 5
repl-disable-tcp-nodelay no
slave-priority 100
appendonly yes
appendfilename "appendonly.aof"
appendfsync everysec
no-appendfsync-on-rewrite no
auto-aof-rewrite-percentage 100
auto-aof-rewrite-min-size 64mb
aof-load-truncated yes
lua-time-limit 5000
cluster-enabled yes
cluster-config-file nodes-6379.conf
cluster-node-timeout 15000
slowlog-log-slower-than 10000
slowlog-max-len 128
latency-monitor-threshold 0
notify-keyspace-events ""
hash-max-ziplist-entries 512
hash-max-ziplist-value 64
list-max-ziplist-size -2
list-compress-depth 0
set-max-intset-entries 512
zset-max-ziplist-entries 128
zset-max-ziplist-value 64
hll-sparse-max-bytes 3000
activerehashing yes
client-output-buffer-limit normal 0 0 0
client-output-buffer-limit slave 256mb 64mb 60
client-output-buffer-limit pubsub 32mb 8mb 60
hz 10
aof-rewrite-incremental-fsync yes
- 赋权:
chmod 777 -R /data/docker/redis-to-cluster/ - 运行 6 个节点:
docker run -it -d --name redis-to-cluster-1 -p 5001:6379 -v /data/docker/redis-to-cluster/config/redis.conf:/usr/redis/redis.conf --net=net-redis-to-cluster --ip 172.19.0.2 redis-to-cluster:3.2.3 bashdocker run -it -d --name redis-to-cluster-2 -p 5002:6379 -v /data/docker/redis-to-cluster/config/redis.conf:/usr/redis/redis.conf --net=net-redis-to-cluster --ip 172.19.0.3 redis-to-cluster:3.2.3 bashdocker run -it -d --name redis-to-cluster-3 -p 5003:6379 -v /data/docker/redis-to-cluster/config/redis.conf:/usr/redis/redis.conf --net=net-redis-to-cluster --ip 172.19.0.4 redis-to-cluster:3.2.3 bashdocker run -it -d --name redis-to-cluster-4 -p 5004:6379 -v /data/docker/redis-to-cluster/config/redis.conf:/usr/redis/redis.conf --net=net-redis-to-cluster --ip 172.19.0.5 redis-to-cluster:3.2.3 bashdocker run -it -d --name redis-to-cluster-5 -p 5005:6379 -v /data/docker/redis-to-cluster/config/redis.conf:/usr/redis/redis.conf --net=net-redis-to-cluster --ip 172.19.0.6 redis-to-cluster:3.2.3 bashdocker run -it -d --name redis-to-cluster-6 -p 5006:6379 -v /data/docker/redis-to-cluster/config/redis.conf:/usr/redis/redis.conf --net=net-redis-to-cluster --ip 172.19.0.7 redis-to-cluster:3.2.3 bash
- 配置 redis-to-cluster-1 节点:
docker exec -it redis-to-cluster-1 bash- 启动容器的 redis:
/usr/redis/src/redis-server /usr/redis/redis.conf
- 启动容器的 redis:
- 其他 5 个节点一样进行启动。
创建 Cluster 集群(通过 redis-trib.rb)
- 配置 redis-to-cluster-1 节点(或者选择其他任意一个节点):
docker exec -it redis-to-cluster-1 bash mkdir -p /usr/redis/clustercp /usr/redis/src/redis-trib.rb /usr/redis/cluster/cd /usr/redis/cluster/- 创建 Cluster 集群(会有交互)(镜像中已经安装了 ruby 了):
./redis-trib.rb create --replicas 1 172.19.0.2:6379 172.19.0.3:6379 172.19.0.4:6379 172.19.0.5:6379 172.19.0.6:6379 172.19.0.7:6379--replicas 1表示为每个主节点创建一个从节点- 如果正常的话,会出现下面内容:
>>> Creating cluster
>>> Performing hash slots allocation on 6 nodes...
Using 3 masters:
172.19.0.2:6379
172.19.0.3:6379
172.19.0.4:6379
Adding replica 172.19.0.5:6379 to 172.19.0.2:6379
Adding replica 172.19.0.6:6379 to 172.19.0.3:6379
Adding replica 172.19.0.7:6379 to 172.19.0.4:6379
M: 9c1c64b18bfc2a0586be2089f13c330787c1f67b 172.19.0.2:6379
   slots:0-5460 (5461 slots) master
M: 35a633853329c9ff25bb93a7ce9192699c2ab6a8 172.19.0.3:6379
   slots:5461-10922 (5462 slots) master
M: 8ea2bfeeeda939abb43e96a95a990bcc55c10389 172.19.0.4:6379
   slots:10923-16383 (5461 slots) master
S: 9cb00acba065120ea96834f4352c72bb50aa37ac 172.19.0.5:6379
   replicates 9c1c64b18bfc2a0586be2089f13c330787c1f67b
S: 8e2a4bb11e97adf28427091a621dbbed66c61001 172.19.0.6:6379
   replicates 35a633853329c9ff25bb93a7ce9192699c2ab6a8
S: 5d0fe968559af3035d8d64ab598f2841e5f3a059 172.19.0.7:6379
   replicates 8ea2bfeeeda939abb43e96a95a990bcc55c10389
Can I set the above configuration? (type 'yes' to accept): yes
>>> Nodes configuration updated
>>> Assign a different config epoch to each node
>>> Sending CLUSTER MEET messages to join the cluster
Waiting for the cluster to join......
>>> Performing Cluster Check (using node 172.19.0.2:6379)
M: 9c1c64b18bfc2a0586be2089f13c330787c1f67b 172.19.0.2:6379
   slots:0-5460 (5461 slots) master
M: 35a633853329c9ff25bb93a7ce9192699c2ab6a8 172.19.0.3:6379
   slots:5461-10922 (5462 slots) master
M: 8ea2bfeeeda939abb43e96a95a990bcc55c10389 172.19.0.4:6379
   slots:10923-16383 (5461 slots) master
M: 9cb00acba065120ea96834f4352c72bb50aa37ac 172.19.0.5:6379
   slots: (0 slots) master
   replicates 9c1c64b18bfc2a0586be2089f13c330787c1f67b
M: 8e2a4bb11e97adf28427091a621dbbed66c61001 172.19.0.6:6379
   slots: (0 slots) master
   replicates 35a633853329c9ff25bb93a7ce9192699c2ab6a8
M: 5d0fe968559af3035d8d64ab598f2841e5f3a059 172.19.0.7:6379
   slots: (0 slots) master
   replicates 8ea2bfeeeda939abb43e96a95a990bcc55c10389
[OK] All nodes agree about slots configuration.
>>> Check for open slots...
>>> Check slots coverage...
[OK] All 16384 slots covered.
- 连接集群测试:
- 进入随便一个节点:
docker exec -it redis-to-cluster-1 bash /usr/redis/src/redis-cli -c- 查看集群情况:
cluster nodes - 写入数据:
set myKey myValue,如果成功会返回:Redirected to slot [16281] located at 172.19.0.4:6379,可以推断它是 redis-to-cluster-3 容器 - 暂定掉 redis-to-cluster-3 容器:
docker pause redis-to-cluster-3 - 重新连接:
/usr/redis/src/redis-cli -c - 查看集群情况:
cluster nodes - 获取值:
get myKey - 重新启动 redis-to-cluster-3:
docker unpause redis-to-cluster-3 - 查看集群情况:
cluster nodes
- 进入随便一个节点:
- Spring Boot 项目 Docker 容器访问 RedisCluster
- application.yml 配置的 IP 地址:172.19.0.2 等
- docker 容器启动增加
--net=host使用宿主机网络
Redis 编译安装
- Redis 安装
- 官网:http://redis.io/
- 官网下载:http://redis.io/download
- 官网 Github 地址:https://github.com/redis
- 此时(20160212) Redis 最新稳定版本为:3.0.7
- 官网帮助中心:http://redis.io/documentation
- Redis 下载(/usr/local):
wget http://download.redis.io/releases/redis-3.0.7.tar.gz(大小:1.4 M)- 安装依赖包:
yum install -y gcc-c++ tcl - 解压:
tar zxvf redis-3.0.7.tar.gz - 进入解压后目录:
cd /usr/local/redis-3.0.7/ - 编译:
make - 编译安装:
make install- 安装完之后会在:
/usr/local/bin目录下生成好几个 redis 相关的文件
- 安装完之后会在:
- 复制配置文件:
cp /usr/local/redis-3.0.7/redis.conf /etc/ - 修改配置:
vim /etc/redis.conf- 把旧值:
daemonize no - 改为新值:
daemonize yes
- 把旧值:
- 启动:
/usr/local/bin/redis-server /etc/redis.conf - 关闭:
redis-cli -h 127.0.0.1 -p 6379 shutdown - 关闭(带密码):
redis-cli -h 127.0.0.1 -p 6379 -a 123456 shutdown - 查看是否启动:
ps -ef | grep redis - 进入客户端:
redis-cli - 关闭客户端:
redis-cli shutdown - 开机启动配置:
echo "/usr/local/bin/redis-server /etc/redis.conf" >> /etc/rc.local - 开放防火墙端口:
- 添加规则:
iptables -I INPUT -p tcp -m tcp --dport 6379 -j ACCEPT - 保存规则:
service iptables save - 重启 iptables:
service iptables restart
- 添加规则:
- 安装依赖包:
Redis-3.0.7 配置
- 编辑配置文件:
vim /etc/redis.conf - Redis 默认的配置文件内容:
# 是否以后台daemon方式运行,默认是 no,一般我们会改为 yes
daemonize no
pidfile /var/run/redis.pid
port 6379
tcp-backlog 511
timeout 0
tcp-keepalive 0
loglevel notice
logfile ""
# 开启数据库的数量,Redis 是有数据库概念的,默认是 16 个,数字从 0 ~ 15
databases 16
save 900 1
save 300 10
save 60 10000
stop-writes-on-bgsave-error yes
rdbcompression yes
rdbchecksum yes
dbfilename dump.rdb
dir ./
slave-serve-stale-data yes
slave-read-only yes
repl-diskless-sync no
repl-diskless-sync-delay 5
repl-disable-tcp-nodelay no
slave-priority 100
appendonly no
appendfilename "appendonly.aof"
appendfsync everysec
no-appendfsync-on-rewrite no
auto-aof-rewrite-percentage 100
auto-aof-rewrite-min-size 64mb
aof-load-truncated yes
lua-time-limit 5000
slowlog-log-slower-than 10000
slowlog-max-len 128
latency-monitor-threshold 0
notify-keyspace-events ""
hash-max-ziplist-entries 512
hash-max-ziplist-value 64
list-max-ziplist-entries 512
list-max-ziplist-value 64
set-max-intset-entries 512
zset-max-ziplist-entries 128
zset-max-ziplist-value 64
hll-sparse-max-bytes 3000
activerehashing yes
client-output-buffer-limit normal 0 0 0
client-output-buffer-limit slave 256mb 64mb 60
client-output-buffer-limit pubsub 32mb 8mb 60
hz 10
aof-rewrite-incremental-fsync yes
Redis-3.2.8 配置
- 编辑配置文件:
vim /etc/redis.conf - Redis 默认的配置文件内容:
# 默认绑定是:127.0.0.1,这样就只能本机才能连上,为了让所有机子连上,这里需要改为:0.0.0.0
bind 0.0.0.0
protected-mode yes
port 6379
tcp-backlog 511
timeout 0
tcp-keepalive 300
daemonize yes
supervised no
pidfile /var/run/redis_6379.pid
loglevel notice
logfile ""
databases 16
save 900 1
save 300 10
save 60 10000
stop-writes-on-bgsave-error yes
rdbcompression yes
rdbchecksum yes
dbfilename dump.rdb
dir ./
slave-serve-stale-data yes
slave-read-only yes
repl-diskless-sync no
repl-diskless-sync-delay 5
repl-disable-tcp-nodelay no
slave-priority 100
appendonly no
appendfilename "appendonly.aof"
appendfsync everysec
no-appendfsync-on-rewrite no
auto-aof-rewrite-percentage 100
auto-aof-rewrite-min-size 64mb
aof-load-truncated yes
lua-time-limit 5000
slowlog-log-slower-than 10000
slowlog-max-len 128
latency-monitor-threshold 0
notify-keyspace-events ""
hash-max-ziplist-entries 512
hash-max-ziplist-value 64
list-max-ziplist-size -2
list-compress-depth 0
set-max-intset-entries 512
zset-max-ziplist-entries 128
zset-max-ziplist-value 64
hll-sparse-max-bytes 3000
activerehashing yes
client-output-buffer-limit normal 0 0 0
client-output-buffer-limit slave 256mb 64mb 60
client-output-buffer-limit pubsub 32mb 8mb 60
hz 10
aof-rewrite-incremental-fsync yes
设置 Redis 请求密码
- 打开
vim /etc/redis.conf配置文件,找到默认是被注释的这一行:# requirepass foobared - 去掉注释,把
foobared改为你想要设置的密码,比如我打算设置为:123456,所以我改为:requirepass 123456 - 修改之后重启下服务
- 有了密码之后,进入客户端,就得这样访问:
redis-cli -h 127.0.0.1 -p 6379 -a 123456 - 如果用 IP 进入客户端,但是报:
Could not connect to Redis at 192.168.1.121:6379: Connection refused- 原因:Redis 默认只允许本机访问,可是有时候我们也需要 Redis 被远程访问。
- 解决办法:
- 修改 Redis 配置文件:
vim /etc/redis.conf - 找到 bind 那行配置,默认是(需要注意的是配置文件中除了注释还有一个默认开启的地方,所以不要漏掉):
# bind 127.0.0.1 - 去掉 # 注释并改为:
bind 0.0.0.0
- 修改 Redis 配置文件:
Redis 常用命令
- 命令是不区分大小写的,但是这里为了方便和后面的 key value 进行区分所以我全部写大写,你也可以用小写。
- 但是需要注意的是:key 是完全区分大小写的,比如 key=codeBlog 和 key=codeblog 是两个键值
- 官网命令列表:http://redis.io/commands
SET key value,设值。eg:SET myblog www.youmeek.comGET key,取值SELECT 0,切换数据库INCR key,递增数字DECR key,递减数字KEYS *,查看当前数据库下所有的 keyAPPEND key value,给尾部追加内容,如果要追加的 key 不存在,则相当于 SET key valueSTRLEN key,返回键值的长度,如果键不存在则返回 0MSET key1 value1 key2 value2,同时设置多值MGET key1 value1 key2 value2,同时取多值EXPIRE key 27,设置指定键的生存时间,27 的单位是秒TTL key,查看键的剩余生存时间- 返回 -2,表示不存在,过了生存时间后被删除
- 返回 -1,表示没有生存时间,永久存储
- 返回正整数,表示还剩下对应的生存时间
PERSIST key,清除生成时间,重新变成永久存储(重新设置 key 的值也可以起到清除生存时间的效果)FLUSHDB,清空当前数据库所有键值FLUSHALL,清空所有数据库的所有键值
把 redis 添加到系统服务中
- 新建文件:
vim /etc/init.d/redis - 添加如下内容:
#!/bin/sh
#
# redis - this script starts and stops the redis-server daemon
#
# chkconfig:   - 85 15
# description:  Redis is a persistent key-value database
# processname: redis-server
# config:      /usr/local/redis-2.4.X/bin/redis-server
# config:      /usr/local/ /redis-2.4.X/etc/redis.conf
# Source function library.
. /etc/rc.d/init.d/functions
# Source networking configuration.
. /etc/sysconfig/network
# Check that networking is up.
[ "$NETWORKING" = "no" ] && exit 0
redis="/usr/local/bin/redis-server"
prog=$(basename $redis)
REDIS_CONF_FILE="/etc/redis.conf"
[ -f /etc/sysconfig/redis ] && . /etc/sysconfig/redis
lockfile=/var/lock/subsys/redis
start() {
    [ -x $redis ] || exit 5
    [ -f $REDIS_CONF_FILE ] || exit 6
    echo -n $"Starting $prog: "
    daemon $redis $REDIS_CONF_FILE
    retval=$?
    echo
    [ $retval -eq 0 ] && touch $lockfile
    return $retval
}
stop() {
    echo -n $"Stopping $prog: "
    killproc $prog -QUIT
    retval=$?
    echo
    [ $retval -eq 0 ] && rm -f $lockfile
    return $retval
}
restart() {
    stop
    start
}
reload() {
    echo -n $"Reloading $prog: "
    killproc $redis -HUP
    RETVAL=$?
    echo
}
force_reload() {
    restart
}
rh_status() {
    status $prog
}
rh_status_q() {
    rh_status >/dev/null 2>&1
}
case "$1" in
    start)
        rh_status_q && exit 0
        $1
        ;;
    stop)
        rh_status_q || exit 0
        $1
        ;;
    restart|configtest)
        $1
        ;;
    reload)
        rh_status_q || exit 7
        $1
        ;;
    force-reload)
        force_reload
        ;;
    status)
        rh_status
        ;;
    condrestart|try-restart)
        rh_status_q || exit 0
    ;;
    *)
        echo $"Usage: $0 {start|stop|status|restart|condrestart|try-restart| reload|orce-reload}"
        exit 2
esac
- 修改权限:
chmod 755 /etc/init.d/redis - 启动服务:
service redis start - 停止服务:
service redis stop - 重启服务:
service ngredisnx restart
Redis 客户端
Redis GUI 管理工具
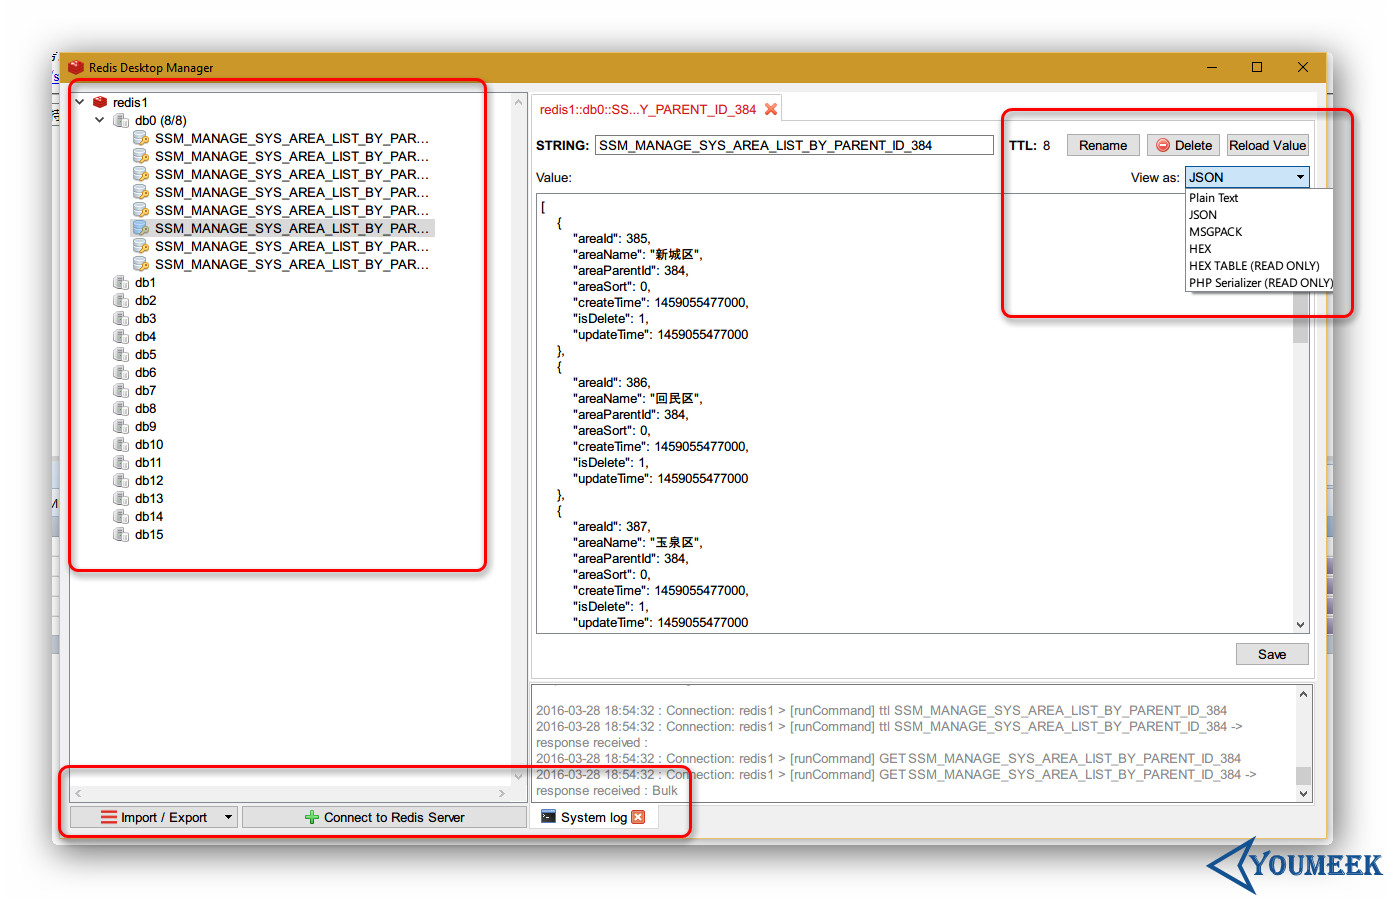
- Redis Desktop Manager
- 官网:http://redisdesktop.com/
- 官网下载:http://redisdesktop.com/download
- 效果如下图:
Redis 主从(主从从)配置
Redis 主从架构
- 假设有两台服务器,一台做主,一台做从
- Redis 主信息:
- IP:12.168.1.114=
- 端口:6379
- Redis 从信息:
- IP:12.168.1.115
- 端口:6379
- Redis 主信息:
- 编辑从机的 Redis 配置文件,找到 210 行(大概),默认这一行应该是注释的:
# slaveof <masterip> <masterport> - 我们需要去掉该注释,并且填写我们自己的主机的 IP 和 端口,比如:
slaveof 192.168.1.114 6379 - 配置完成后重启从机 Redis 服务
- 重启完之后,进入主机的 redis-cli 状态下,输入:
INFO replication- 可以查询到当前主机的 redis 处于什么角色,有哪些从机已经连上主机。
- 此时已经完成了主从配置,我们可以测试下:
- 我们进入主机的 redis-cli 状态,然后 set 某个值,比如:
set myblog YouMeek.com
- 我们进入主机的 redis-cli 状态,然后 set 某个值,比如:
- 我们切换进入从机的 redis-cli 的状态下,获取刚刚设置的值看是否存在:
get myblog,此时,我们可以发现是可以获取到值的。 - 但是有一个需要注意的:从库不具备写入数据能力,不然会报错。 从库只有只读能力。
Redis主从从架构
- Redis 主从从的意思:看桌面上的截图。
- 优点,除了减少主库连接的压力,还有可以关掉主库的持久化功能,把持久化的功能交给从库进行处理。
- 第一个从库配置的信息是连上主库,后面的第二个从库配置的连接信息是连上第一个从库, 假如还有第三个从库的话,我们可以把第三个从库的配置信息连上第二个从库上,以此类推。
Redis 3 主 2 从 3 哨兵--配置集群+HA(高可用、故障转移)
- 3 主 2 从 3 哨兵(平均每台机子是:1 主 2 从 3 哨兵)
- 一个健康的集群部署,至少需要 3 个 Sentinel 实例,官网(Example 2: basic setup with three boxes):https://redis.io/topics/sentinel
- 这里使用了 3 台阿里云服务器,系统:CentOS 6.8
- 3 主:
192.168.1.1
先做 Redis 集群,然后写个 Spring Data Redis 测试是否可以正常使用该集群
- 每台服务器各有一个 Redis 程序,然后有 3 个不同配置文件,启动 Redis 的时候指定各自的配置文件,依次表示 3 个 Redis 程序。
- 先关闭防火墙,避免各种端口未开放问题
- Redis 目前支持主从复制,但是主挂掉后,从也只能只读,所以需要在主挂掉后,从一个其中一个从节点中升级到主,这里用到的是:redis sentinel
- 漂移 IP 这里用到 keepalived
Windows 版本的 Redis
- Windows 是别人改造的版本,需要到这里下载:https://github.com/MSOpenTech/redis/releases
- 使用
.msi后缀的文件进行安装,此安装包自带安装 Windows 服务 - 配置文件也跟原版本不一样,叫做:
redis.windows.conf
Redis Info
- 客户端下命令行:
info
server 部分记录了 Redis 服务器的信息,它包含以下域:

redis_version : Redis 服务器版本
redis_git_sha1 : Git SHA1
redis_git_dirty : Git dirty flag
os : Redis 服务器的宿主操作系统
arch_bits : 架构(32 或 64 位)
multiplexing_api : Redis 所使用的事件处理机制
gcc_version : 编译 Redis 时所使用的 GCC 版本
process_id : 服务器进程的 PID
run_id : Redis 服务器的随机标识符(用于 Sentinel 和集群)
tcp_port : TCP/IP 监听端口
uptime_in_seconds : 自 Redis 服务器启动以来,经过的秒数
uptime_in_days : 自 Redis 服务器启动以来,经过的天数
lru_clock : 以分钟为单位进行自增的时钟,用于 LRU 管理
clients 部分记录了已连接客户端的信息,它包含以下域:

connected_clients : 已连接客户端的数量(不包括通过从属服务器连接的客户端)
client_longest_output_list : 当前连接的客户端当中,最长的输出列表
client_longest_input_buf : 当前连接的客户端当中,最大输入缓存
blocked_clients : 正在等待阻塞命令(BLPOP、BRPOP、BRPOPLPUSH)的客户端的数量
memory 部分记录了服务器的内存信息,它包含以下域:

used_memory : 由 Redis 分配器分配的内存总量,以字节(byte)为单位
used_memory_human : 以人类可读的格式返回 Redis 分配的内存总量
used_memory_rss : 从操作系统的角度,返回 Redis 已分配的内存总量(俗称常驻集大小)。这个值和 top 、 ps 等命令的输出一致。
used_memory_peak : Redis 的内存消耗峰值(以字节为单位)
used_memory_peak_human : 以人类可读的格式返回 Redis 的内存消耗峰值
used_memory_lua : Lua 引擎所使用的内存大小(以字节为单位)
mem_fragmentation_ratio : used_memory_rss 和 used_memory 之间的比率
mem_allocator : 在编译时指定的, Redis 所使用的内存分配器。可以是 libc 、 jemalloc 或者 tcmalloc 。
- 常关注信息:
used_memory_rss_human:系统给redis分配的内存(即常驻内存)
used_memory_peak_human : Redis 的内存消耗峰值
used_memory_lua_human : 系统内存大小
expired_keys : 过期的的键数量
evicted_keys : 因为最大内存容量限制而被驱逐(evict)的键数量
used_cpu_sys_children : Redis 后台进程在 内核态 消耗的 CPU
used_cpu_user_children : Redis 后台进程在 用户态 消耗的 CPU
Redis 基准压力测试
- 默认安装包下就自带
- 官网文档:https://redis.io/topics/benchmarks
- 运行:
redis-benchmark -q -n 100000-q表示 quiet 安静执行,结束后直接输出结果即可-n 100000请求 10 万次
PING_INLINE: 62189.05 requests per second
PING_BULK: 68634.18 requests per second
SET: 58241.12 requests per second
GET: 65445.03 requests per second
INCR: 57703.40 requests per second
LPUSH: 61199.51 requests per second
RPUSH: 68119.89 requests per second
LPOP: 58309.04 requests per second
RPOP: 63775.51 requests per second
SADD: 58479.53 requests per second
HSET: 61500.61 requests per second
SPOP: 58241.12 requests per second
LPUSH (needed to benchmark LRANGE): 59523.81 requests per second
LRANGE_100 (first 100 elements): 60350.03 requests per second
LRANGE_300 (first 300 elements): 57636.89 requests per second
LRANGE_500 (first 450 elements): 63251.11 requests per second
LRANGE_600 (first 600 elements): 58479.53 requests per second
MSET (10 keys): 56401.58 requests per second
- 只测试特定类型:
redis-benchmark -t set,lpush -n 100000 -q